Marmalade Cake

Oranges are in season and we have been inundated with fruit from people’s gardens.  We’ve eaten them, made orange cake, made marmalade, put them in salads and still we have a bag of them in the kitchen.  So I started to look for recipes online and in a forum I came across this recipe.  The poster said it came from Nigel Slater in the Guardian, however I haven’t been able to find it online.

The original recipe suggested an orange drizzle to top it but I found it was sweet enough without icing, so the next time I put thinly sliced oranges into the base of the tin to make an upside down cake (and use more oranges!) An electric mixer is really useful for this cake because it can be difficult to mix the marmalade in thoroughly with just a spoon.

Ingredients

  • 175g butter
  • 175g sugar (golden works well)
  • 3 large eggs, beaten
  • 1 heaped tbsp marmalade (approx. 80g)
  • 175g self-raising flour, or 170g plain flour and 1 tsp baking powder
  • 1 orange
  • Optional: 1-2 oranges sliced thinly and 1 dessertspoon of sugar
  1. Preheat the oven to 180°c and if you want to top the cake with orange, wash 1-2 oranges and slice them thinly.  Grease the tin (I used a 25cm round mould) and sprinkle sugar, then place the orange slices onto the base.
  2. Cream the butter and sugar until pale and fluffy.
  3. Grate the orange zest finely, add it to the butter and sugar, and gradually add the egg.
  4. Mix in the marmalade and the juice of the orange.
  5. Fold in the flour and baking powder gently.
  6. Pour into the mould and bake for 35-40 minutes or until a skewer comes out clean.  Cool on a wire rack.

DSC03246

Marmalade cake

White chocolate and cardamom biscuits

I don’t know why, but I’ve never been much of a biscuit baker.  I love cakes, desserts, savoury dishes, all sorts, but bisucuits never really interested me.   A couple of years ago though, a friend made some biscuits which made me realise they absolutely are a medium worth exploring.  They’re quick and easy-ish to make, much more portable than cakes, and great for picnics or long journeys because you need no knives or plates to share and enjoy them.

I asked her for the recipe and she kindly obliged. So these were my first biscuits: white chocolate and cardamom shortbread.  Might sound strange but it’s a great combination – the slightly floral notes of the cardamom balance the rich buttery shortbread and the sweet white chocolate in a way that makes it very easy to eat too many in one sitting!

I’ve tried lots of tips regarding biscuit temperature before baking: freezing for 30 minutes, freezing overnight, cooling in the fridge, putting them straight in, etc. I found that freezing the dough overnight makes it so hard it’s nearly impossible to cut neatly, and that baking them straight away means they spread a lot.  So I recommend cooling before baking but not freezing solid: 30 minutes in the fridge is fine (although you can keep it a day or two before baking).

Another learning curve was baking time: I followed the recipe to the letter but the chocoloate discoloured and went crispy, so keep an eye on them and remember they keep cooking after you take them out of the oven.  The original recipe said 25-30 minutes but maybe they make bigger biscuits.  I usually bake them for around 12 minutes, and take them out just before I think they look ready.

Ingredients (makes approx. 30 biscuits)

  • 6 cardamom pods
  •  250g butter
  • 50g sugar
  • 250g plain flour
  • 125g corn flour
  • 50g white chocolate (cut into chunks)

1. Split open the cardamom pods and crush the seeds to a powder in a pestle and mortar. DSC01389.JPG

2. Cream the butter and sugar in a bowl and add the crushed cardamom seeds.  Mix well.

3. Add the flour and corn flour and mix/knead to a consistent dough.

4. Knead in the chocolate chunks and roll the dough into a sausage apporximately 5cm in diameter.

5. Wrap the sausage in cling film and leave to cool for at least 30 minutes in the fridge.DSC01983

6. Pre-heat the over to 170°c and cut the dough into 1cm slices.  Arrange on a baking tray and cook for approximately 12-15 minutes (take out of the oven before the chocolate discolours).


White Chocolate and Cardomam biscuits

Pastel Vasco (Basque Cake)

One of the things I love about Spain is that each region has its own character, landscape, food, and sometimes even their own language.  When I went to the Basque country, I was reminded of British and Irish countryside: countless shades of green, magpies, wild coastline and, of course, rain!  It’s a really beautiful region and as a language lover I was fascinated by the Basque language (Euskara) – it is totally different to Spanish and is actually a bit of a historical mystery becuase there is no other language like it.  I managed to learn to say thank you, eskerrik asko, but failed to get any further.

Apart from the beautiful towns of Bilbao, San Sebastian and Zarautz, we went to the Balenciaga museum (the fashion house was founded in San Sebastian), a Txoko (a sort of members only food society), and of course some stunning beaches.  Basque food is completely different from Andalucian food and whilst I enjoyed the pintxos – small snacks served on slices of bread – the real star for me was Basque cake.

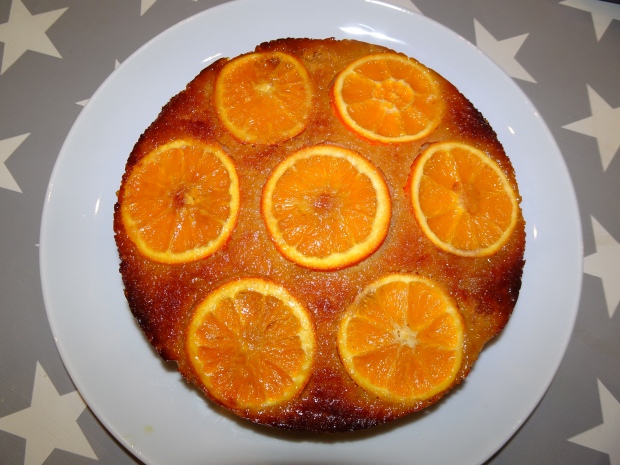
Basque cake has a pastry shell and a sort of custardy filling. It’s rich and slightly almondy, perfect with a cup of tea or coffee.  The thick pastry means it travels quite well (I have had friends bring it on public transport from the Basque country to Andalucia) and becuase it’s a dense, creamy cake, one will go a long way.  A long time ago I asked for recipes and this was sent to me by my friend Piluca, but I didn’t get round to making it.  This weekend I had a friend visiting who LOVES Basque cake, and it was the perfect weather for sitting indoors with a blanket and a cuppa, so I decided it was time.  We were not disappointed!

It wasn’t very difficult but it does need time – the pastry has to be really cold so the butter needs 30 minutes in the freezer before you start, then 1 – 1.5 hours in the freezer once the pastry is made, and at least 10 minutes to cool once you put it in the mould, as well as 40 minutes in the oven, so I recommend setting aside 2-3 hours to make this without rushing, although you’ll have at least an hour to go away and do other things while it cools and rests.

Ingredients for the pastry

  • 200g butter
  • 300g flour
  • 150g sugar
  • 60g ground almonds
  • 2 eggs
  • pinch of salt

Ingredients for the filling

  • 400ml whole milk
  • 1 cinnamon stick
  • 40g sugar
  • 50g flour
  • 2 eggs
  • 50g butter
  • 1 tsp vanilla essence

As well as the ingredients, you will need a saucepan, jug, mixing bowl, sieve, rolling pin and a cake tin with a removable base.  I used a 22cm diameter tin.

  1. Weigh the butter for the pastry and put it in the freezer.
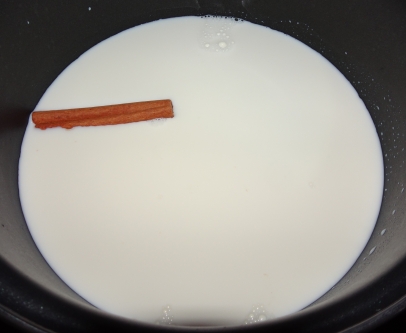
  2. Make the filling first to make sure it has plenty of time to cool before it goes into the pastry.  Heat the milk and the cinnamon stick in a saucepan until the milk boils, take off the heat and leave to cool for 10 minutes.dsc02996.jpg
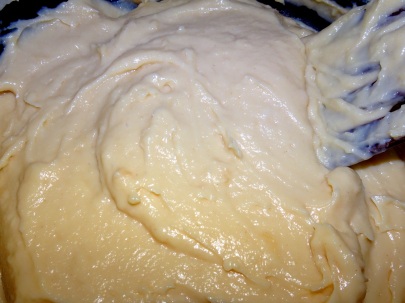
  3. Strain the milk into a jug, then pour most of it back into the saucepan, keeping about half a glassful aside (I kept it in the jug). Heat the saucepan of milk again, and to the milk in the jug add the flour, sugar, vanilla essence and eggs.  Mix these ingredients well and when the milk in the saucepan boils, add this mix to the milk.  Stir it well and you’ll notice it gets thick very quickly.  Simmer it for a couple of minutes, and add the butter.  It’ll be a thick custard by now. Take it off the heat and put it aside to cool.DSC02997
  4. Now it’s time to make the pastry. Take the butter out of the freezer and cut it into cubes.  Put it in a mixing bowl with the flour, almonds, sugar and salt (I was quite generous with my pinch of salt and I liked the way it gave the pastry a slightly salty edge which contrasted with the rich, creamy filling).  Use a fork to mix these ingredients until you have a breadcrumb-like texture. DSC03000
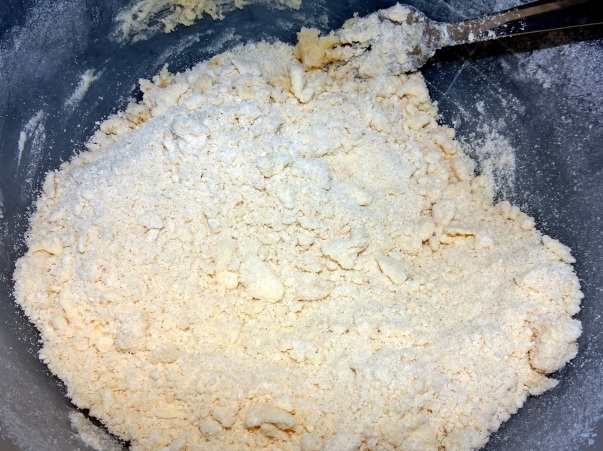
  5. Beat the 2 eggs for the pastry, and add them gradually to the dough.  I found it easiest to knead them into the mix.  Wrap the dough in cling film and put in the freezer to cool for 1-1.5 hours.dsc03003.jpg
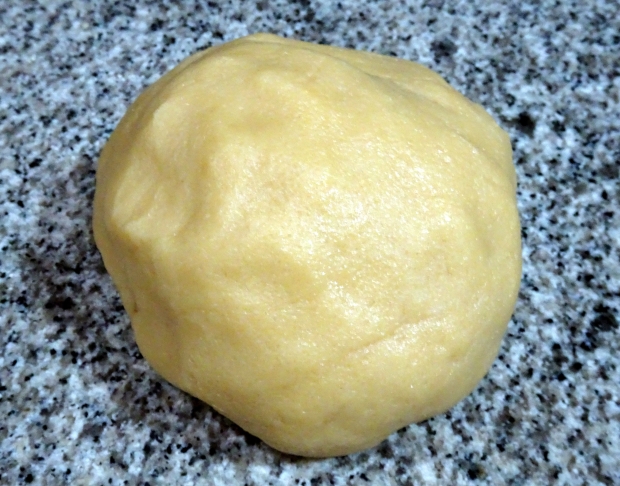
  6. Put the oven on at 180°c and grease the tin.  When the pastry has cooled, cut it into thirds and put one third back in the freezer.  Combine the other two thirds and roll to a circle of approximately 5mm thick.  I found it helpful to put the dough between 2 sheets of greasproof paper to do this as it is quite sticky.
  7. Now, use this circle of pastry to line the base and sides of the cake tin.  Use your fingers to push it into the bottom and sides of the tin, trying to get it to an even height around the tin.  Cool again in the freezer for 10 minutes.DSC03004
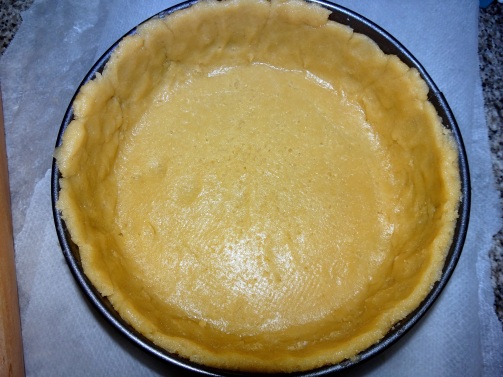
  8. Now it’s time to fill the pastry.  Pour the filling into the pastry base, roll the remaining dough to make a lid and use your fingers to seal the lid and sides.DSC03007
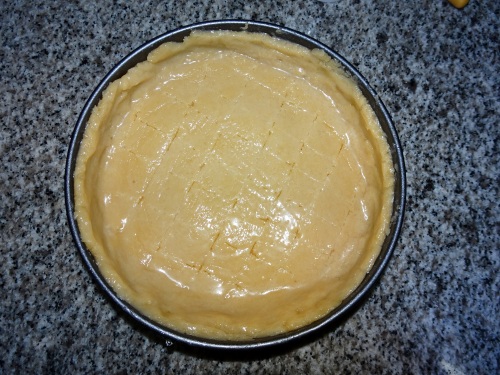
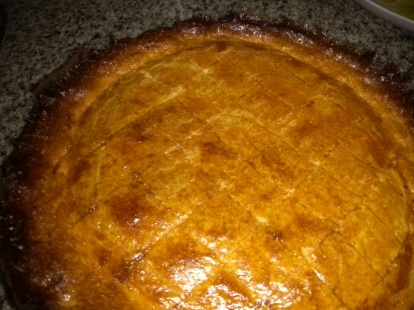
  9. Brush the lid with egg (or milk), score lines in the top and bake for 40 minutes. As you can see, mine had a couple of minutes too long and it ‘caught’ (bake off speak for burning the edges), but it was only the very edge so the rest of it was still delicious.  I think I left the pastry too high around the edges – I’ll trim it next time.IMG_20181018_153513123

That’s it!  If it doesn’t get eaten straight away, you can keep it in the fridge for a couple of days.

DSC03009.JPG

Coffee and walnut cupcakes

Bake off is back!  So even though she isn’t in it any more, here’s another recipe from Mary Berry, with the addition of a buttercream from James Martin (I wanted to practise piping).  They make a great afternoon treat and it’s a quick bake.  She says it makes 24 cakes in a muffin tin but maybe mine is bigger; I get 12.

Ingredients

  • 175g butter
  • 175g sugar
  • 3 eggs
  • 1 tbsp instant coffee
  • 2 tsp water
  • 155g self raising flour (or 150g plain flour and an extra 1 tsp baking powder)
  • 1 tsp baking powder
  • 2 tbsp chopped walnuts

Coffee buttercream

  • 100g butter
  • 200g icing sugar
  • 2 tsp instant coffee
  • 1 tbsp boiling water
  1. Preheat the oven to 200º and line the muffin tin with paper cases. Cream the butter and sugar together, then add the eggs.
  2. Dissolve the coffee powder in the water and add to the mix.  Stir in the flour and baking powder, and finally the walnuts.  (If you prefer, you can use an electric mixer – throw in everything but the walnuts and give it a good mix! Stir in the walnuts with a spoon.)DSC01824
  3. Divide the mixture between the cake cases and bake for 10-12 minutes, then cool on them on a wire rack.DSC01831
  4. When they’re cool, dissolve the instant coffee in the water.  Mix the butter with an electric whisk until soft and creamy, then add the icing sugar.  Finally, mix in the dissolved coffee and you can either pipe it on, or use a knife to spread it on the cakes if you prefer.  Decorate with a walnut.dsc02862.jpg